Marvelous Designer tips and tricks
At the first I should admit that Marvelous Designer is one of the most affective software on CG world. It presents a lot of feature and ability to model and animate clothes as highest level as possible in virtual world whereas there is a long way to go. Marvelous Designer users still suffered a lot of bugs after 4 version passed. In my last experience of working with it and struggling to animate a very complex Kurdish cloth (for one of my character) some useful result are reached, I wish be helpful for you.
1- After days and nights test all of [Property Editor] I found that the most important parameter is your avatar , nothing else! ... Those parameter work great , you should avoid Avatar Pinching specially between Forearm and Arm , Thigh and Shin , Arm and Chest and ... and also your avatar shouldn't include jump in vertices and jaggedness outlines... and always try to export 30 frames animation instead of 24 frames from your based software ( for me it's 3ds Max).
2- Simulating an animation cloth is somehow tricky , Despite of our imaginations of those words [choosing complete or normal mode for simulate] Complete doesn't mean the most suitable for your animation , it's not as flexible as tolerating several layers on each other vise versa it's better reducing accuracy in [Number of Simulation], I use 1 instead of 5 and [Self Collision Iteration Count] 1 not more, It works for this model.
3- Activating [Vertex-Triangle] can affect on accuracy of simulate in some critical point like , Tips of avatar fingers and a small gap between Arm and Forearm and ... for this model I turn it on.
4- Another vital point is Thickness-Simulation(mm) , avoid putting it less than 3 mm , because it can not realize of very small bump (differences between vertices position) , and also I recommend that put it a little more than 3 if there is intersection between garments .
5-It's routine that starting modeling a cloth with particle distance (mm) 20 and for better appearance changing at the end to 5 or 7 , it's not a point for simple model but if you have a lot of tied part like the end part of my model , it's better to reduce it slightly , 20 , 15 , 10 , 7 or 5 by this way your ties will remain in it's original figure .
6- You are trying hard to design and sewing garment part just fit with your avatar . but it's not enough for animation , sometimes in some extreme poses avatar pull garments until make it force to intersect or explode , and you try and try again to change Property Editor parameters but I recommend to resize your garments a little then simulate it again.
7- If you face with a long time animation in my case 3000 frame to simulate , I recommend to divide it in some small part for example 0 - 1000 , 1001 - 2000 , 2001 - 3000 and even smaller part , by this way you have a chance and opportunity to simulate that part again instead all of it if some craps happened , because simulate is a random process and twice simulate a part will terminate difference result.
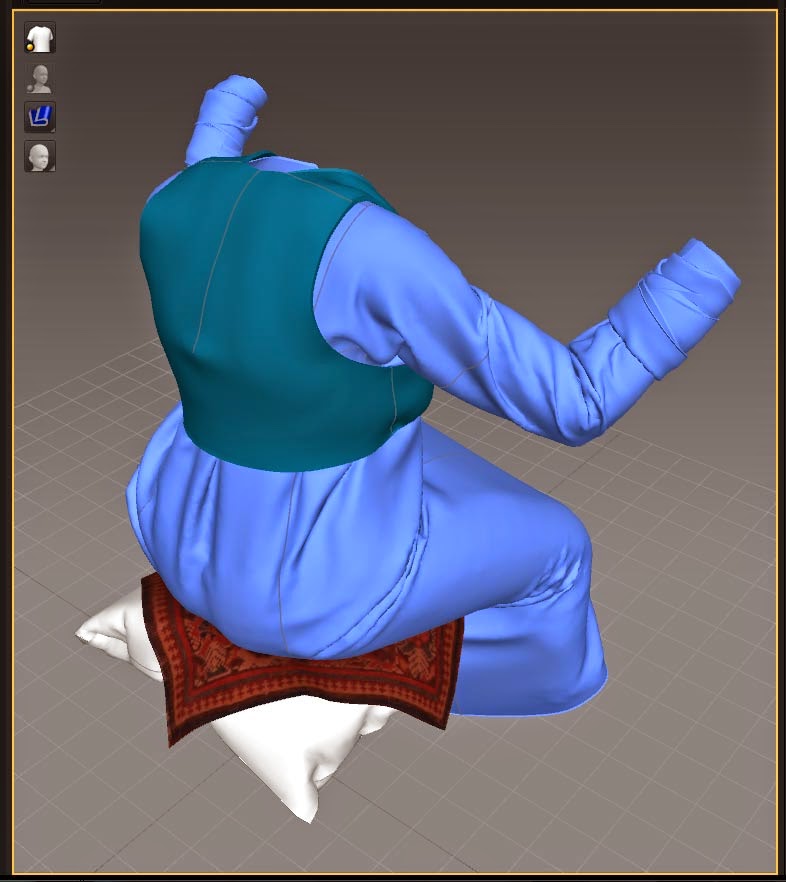
8- In some part where is an interaction between two different garment like seat area may be better to use Strengthen (new feature in version 4) . It causes to calculate stiffness automatically and very smooth result that can be great for those part.
9- At the end for long time animation when you export it in a format like Point Cache 2 for import animation in 3ds Max , it may cause crap while its value is something near 4 GB . The only way I could find was dividing animation in some smaller part to export in Point Cache and it worked for me.
Wish it can be helpful
Azad Jannati 2014


1- After days and nights test all of [Property Editor] I found that the most important parameter is your avatar , nothing else! ... Those parameter work great , you should avoid Avatar Pinching specially between Forearm and Arm , Thigh and Shin , Arm and Chest and ... and also your avatar shouldn't include jump in vertices and jaggedness outlines... and always try to export 30 frames animation instead of 24 frames from your based software ( for me it's 3ds Max).
2- Simulating an animation cloth is somehow tricky , Despite of our imaginations of those words [choosing complete or normal mode for simulate] Complete doesn't mean the most suitable for your animation , it's not as flexible as tolerating several layers on each other vise versa it's better reducing accuracy in [Number of Simulation], I use 1 instead of 5 and [Self Collision Iteration Count] 1 not more, It works for this model.
3- Activating [Vertex-Triangle] can affect on accuracy of simulate in some critical point like , Tips of avatar fingers and a small gap between Arm and Forearm and ... for this model I turn it on.
4- Another vital point is Thickness-Simulation(mm) , avoid putting it less than 3 mm , because it can not realize of very small bump (differences between vertices position) , and also I recommend that put it a little more than 3 if there is intersection between garments .
5-It's routine that starting modeling a cloth with particle distance (mm) 20 and for better appearance changing at the end to 5 or 7 , it's not a point for simple model but if you have a lot of tied part like the end part of my model , it's better to reduce it slightly , 20 , 15 , 10 , 7 or 5 by this way your ties will remain in it's original figure .
6- You are trying hard to design and sewing garment part just fit with your avatar . but it's not enough for animation , sometimes in some extreme poses avatar pull garments until make it force to intersect or explode , and you try and try again to change Property Editor parameters but I recommend to resize your garments a little then simulate it again.
7- If you face with a long time animation in my case 3000 frame to simulate , I recommend to divide it in some small part for example 0 - 1000 , 1001 - 2000 , 2001 - 3000 and even smaller part , by this way you have a chance and opportunity to simulate that part again instead all of it if some craps happened , because simulate is a random process and twice simulate a part will terminate difference result.
8- In some part where is an interaction between two different garment like seat area may be better to use Strengthen (new feature in version 4) . It causes to calculate stiffness automatically and very smooth result that can be great for those part.
9- At the end for long time animation when you export it in a format like Point Cache 2 for import animation in 3ds Max , it may cause crap while its value is something near 4 GB . The only way I could find was dividing animation in some smaller part to export in Point Cache and it worked for me.
Wish it can be helpful
Azad Jannati 2014


Labels: CG Experiences
posted by Azad Jannati @ 6:36 AM
0 Comments
![]()


0 Comments:
Post a Comment
Subscribe to Post Comments [Atom]
<< Home